-
The Surface Problem: It Looks Like a Bad Part
-
Deeper Cause 1: Contamination Finds the Weakest Seal
-
Deeper Cause 2: Corrosion Is a Geometry Problem
-
Deeper Cause 3: The Metal and Finish Specs Are Not Negotiable
-
The Cost of Ignoring the Root Cause
- What to Check Before You Spend Money
-
The Honest Part and the Bottom Line
Let me get the obvious thing out of the way first. If you searched for a 'Bilstein shock absorber' or a 'Bilstein 5100 Ford Transit front strut,' there's a good chance you're thinking of the German suspension company with the same name. I am not that company. I work at a metal parts manufacturer called bilstein, where we make stamped components, progressive dies, CNC machined parts, forgings, and aluminum extrusions for automotive applications. So I don't want you to think I'm here to sell you a damper.
What I can do is explain the failure patterns I see in the parts around those components. Over the last four years, I've reviewed roughly 200+ unique part numbers a year. In our Q1 2024 quality audit, we rejected about 9% of first deliveries because of issues like coating thickness, thread form, taper angle, or missing material certifications. That's not a sneaky sales pitch. It's context for why I believe suspension and drivetrain failures are rarely random.
The Surface Problem: It Looks Like a Bad Part
The surface problem is always the part. The ball joint has play. The CV axle clicks. The throttle body injector drips. The shock absorber on the vehicle has a brand name, and it might be a Bilstein shock absorber on the spec sheet. But the noise that brought the car into the shop is usually not coming from the damper. So the natural answer is to replace the bad part. Sometimes that fixes it. A lot of times it doesn't.
I've seen this pattern enough times that I no longer believe the part that wore out is the true cause. The ball joint failure might be a taper fit failure. CV joint issues might be the result of a torn boot that was never noticed. The throttle body injector might be failing because the fuel filter was changed too late. If you don't address the condition that killed the original part, the replacement will die the same way.
Deeper Cause 1: Contamination Finds the Weakest Seal
Let's start with the throttle body injector and CV joint issues. They seem unrelated, but the mechanism is the same: contamination gets past a seal and attacks a precision surface.
A throttle body injector is more than a nozzle. It has a sintered metal filter, a needle, a spring, and a coil housing. The body is often machined from an aluminum extrusion or a stamping, and the internal clearance is tiny. When the fuel filter gets old, microscopic particles can reach the injector inlet. Some of those particles lodge under the needle seat. The injector starts to leak or spray unevenly, and the idle turns rough. The injector didn't wear out. It was poisoned by contamination.
CV joint issues are the same story. The outer joint is protected by a rubber boot and two metal clamps. Once the boot cracks or a clamp is over-tightened, water and road grit work their way into the joint. The hardened steel race starts to pit. The clicking sound you hear on turns is the ball bearings dropping into those pits. By the time you hear it, a new axle is the only realistic fix. But the underlying issue is that the boot or clamp failed first.
What most people don't realize is that 'internally sealed for life' parts still need external seals inspected. A CV boot is a wear item even if the joint is not. The same logic applies to ball joint boots. If the boot is torn, the joint is on a timer.
Deeper Cause 2: Corrosion Is a Geometry Problem
Corrosion is the second cause, and it's a bigger deal than most people think. On a Ford Transit, for example, the front knuckle and ball joint taper sit right in the road-salt zone. You may be installing a brand-new Bilstein 5100 Ford Transit front strut, but if the old ball joint taper is frozen into the knuckle, the install stops.
What I see in returned cores is aluminum knuckle corrosion around a steel ball joint stud. The steel stud oxidizes, the aluminum bore oxidizes, and the taper effectively welds together. Then someone tries to pull the joint with a pickle fork. The knuckle cracks. Or the stud snaps. The new strut is fine. The part that ruined the day was the unseen corrosion at the interface.
Corrosion also affects the small parts around the throttle body. An injector body or its mounting flange can corrode if the engine bay is exposed to salt and moisture. Aluminum doesn't turn orange like steel, but it can develop white oxide that flakes off and ends up in the intake air. If you're cleaning a throttle body, that's why the area around the injector needs to be clean before you remove anything.
Deeper Cause 3: The Metal and Finish Specs Are Not Negotiable
This is where I get into my own lane. I've rejected first articles because the drawing said 2.0 mm cold rolled steel and the supplier sent 1.8 mm. Visually, you can't tell the difference. Mechanically, you absolutely can. The bending stiffness changes, and a bracket that used to survive road vibration starts to crack.
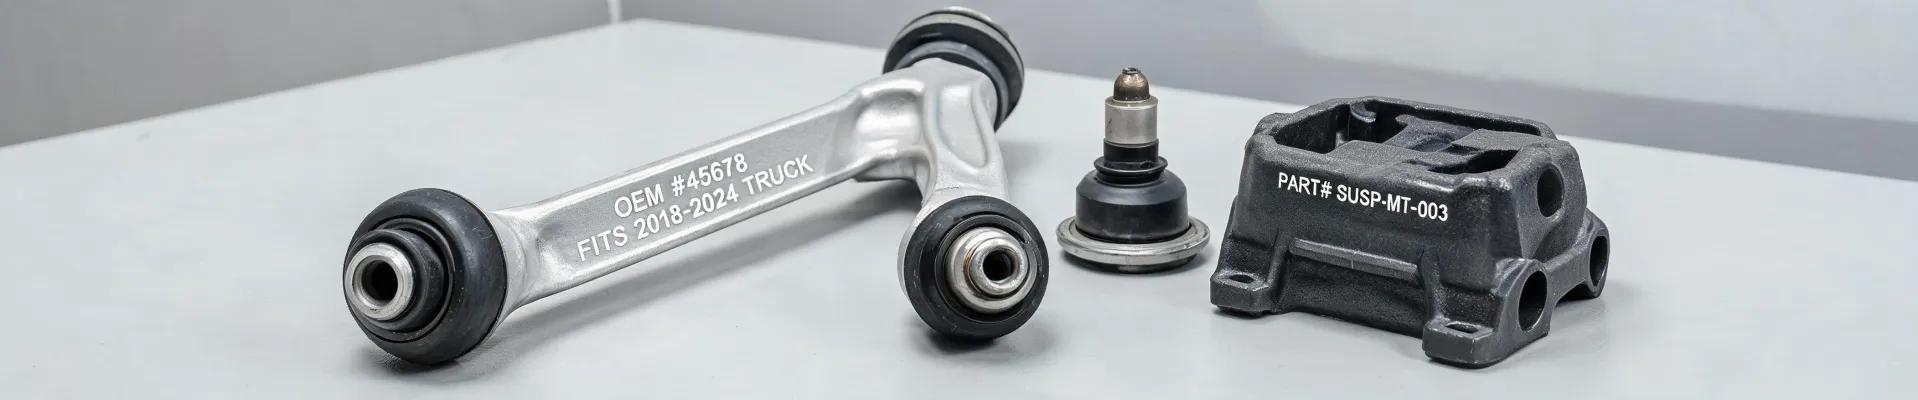
Ball joint housings can be forgings or stampings. Forged housings are heavier and can take more abuse, but they're not automatically better if the socket is ground incorrectly. Stamped housings are lighter and cheaper, but they rely heavily on steel thickness, weld depth, and the shape of the stamping. If the supplier takes a shortcut there, the joint will feel right for about 6,000 miles and then develop play.
Here's something vendors won't tell you: the term 'heavy-duty' is not a spec. It's a marketing word. Per FTC advertising guidance (ftc.gov), quality claims need substantiation. So when a supplier says 'heavy-duty' or 'OEM-quality,' I ask for the material certification and the hardness report. If they provide it, fine. If they can't, I don't buy the story.
I don't have hard data on how many aftermarket ball joints are manufactured without a proper material cert. But based on the samples we've inspected, my sense is that documented suppliers are the exception, not the rule. The way I see it, the document is more valuable than the brand sticker on the box.
The Cost of Ignoring the Root Cause
Let's do the math. A cheap replacement part may be under $30, but the labor to replace it, align the vehicle, and clean the knuckle is often roughly $200 to $500 depending on your region. If you replace it again because the taper was corroded or the knuckle bore was ovaled, you're paying that labor a second time.
A fleet customer once saved $40 by buying a bargain lower ball joint. Eight months later, the joint had axial play. The second repair included a wheel bearing job because the mechanic used a hammer on the knuckle to break the seized taper. The final bill was over $400. That's the classic shortsighted-purchase pattern.
In our own plant, we rejected a batch of stamped brackets because the zinc plating was 2 microns thinner than spec. The parts looked perfect. In salt-spray testing, they failed at 48 hours instead of the required 72. We sent them back. It cost the vendor money, but it also delayed our customer's production. The point is not to be paranoid. It's to verify what you are buying.
What to Check Before You Spend Money
Here's where I finally get to the short practical part.
For a Bilstein 5100 Ford Transit front strut installation
If you're installing a Bilstein 5100 Ford Transit front strut, check the components that connect the damper to the vehicle. The damper itself might be excellent, but the top mount, bearing, spring seat, and pinch bolt will decide whether the install feels quiet.
Rotate the top strut bearing by hand. If it feels dry or notched, replace it. A new damper on a dead bearing will only mask the noise for a few weeks. Look at the rubber upper mount. If it has cracks or if the center stud looks bent, replace it. Check the pinch bolt at the knuckle. If the threads are corroded or the bolt does not meet the torque spec, the strut may shift slightly in the knuckle on impacts. That shift sounds a lot like a bad strut.
CV joint issues and throttle body injector checks
For CV joint issues, inspect the boots before you hear the click. Grease spray on the inside of the wheel is a warning that the boot has failed. If you catch it early, you can replace the boot or the axle before the joint starts clicking. Once you hear clicking, the joint is already damaged. Replacing the axle is fine, but also inspect the hub bearing and the ball joint taper while it's apart.
For a throttle body injector, I would change the fuel filter before condemning the injector. If the injector has an internal filter, some can be cleaned with an ultrasonic cleaner, but if the fuel rail is full of debris, cleaning one injector won't solve the problem. Replace the injector if needed, but solve the contamination source first.
How to remove a ball joint (and when not to)
Here's the shortest safe version of how to remove a ball joint:
- Support the lower control arm or hub with a jackstand.
- Remove the wheel, cotter pin, and castle nut. Leave the nut on a few turns for protection.
- Use a ball joint separator or pickle fork to break the taper.
- Tap the knuckle near the taper with a brass hammer if needed. Do not use a sledgehammer on an aluminum knuckle.
- Once the taper is free, remove the joint from the control arm using a press or the appropriate tool.
- Clean the taper bore and check for scoring or an oval shape.
The last step matters more than people think. If the bore is damaged, a new ball joint will not sit correctly. The car will still feel loose. At that point, the honest answer is to replace the steering knuckle or use an oversized service joint if the vehicle supports one. It's not cheap. It's less expensive than doing the job twice.
The Honest Part and the Bottom Line
I'm not going to tell you that a specific shock absorber or joint brand is the best. I can't test everything, and I don't have hard data on every product. What I can tell you is that the failures I see are usually caused by contamination, corrosion, or out-of-spec metal. A brand name on the damper doesn't change any of those three.
So if you're here because of a Bilstein shock absorber or a Bilstein 5100 Ford Transit front strut, the important question is not whether the damper is good. It probably is. The important question is whether the parts around it are good enough to let it work.
And if you're here because of CV joint issues or because you need to know how to remove a ball joint, the procedure matters, but the diagnosis matters more. Understanding what killed the old part is the step most people skip. In my experience, that step is exactly where the money is saved.
One caveat: I work in B2B manufacturing with mid-volume orders and regular first-article inspections. If you're doing one repair in your driveway, you won't have a salt-spray chamber. That's fine. You can still apply the same logic: find out where the water or dirt got in, and fix that before you install the new part.

Jane Smith
I’m Jane Smith, a senior content writer with over 15 years of experience in the packaging and printing industry. I specialize in writing about the latest trends, technologies, and best practices in packaging design, sustainability, and printing techniques. My goal is to help businesses understand complex printing processes and design solutions that enhance both product packaging and brand visibility.
Leave a sourcing comment